Hiking and backpacking share many things in common.
Walking. Nature. Solitude. Companionship. Stepping away.
What makes backpacking different is carrying everything you need for multiple days. With hiking, the day dictates the length of the experience. With backpacking, the end of the day doesn’t end the experience.
It opens to a new one.
If you have never spent the night in the backcountry, the first time can be daunting. There are a lot of decisions to make, and there is no shortage of people willing to tell you what gear you absolutely need.
There are guides for the best tent, the best sleeping bag, the lightest backpack, and the perfect way to sleep in the backcountry.
This isn’t one of those guides.
Instead, let’s look at what you actually need to begin backpacking and how you can build a system that works for you.
What Do I Need?
There are some basics you need to take with you. Shelter. Something to sleep on and under. A way to carry it all.
That sounds simple, but figuring out exactly what those things should be can get complicated quickly. There are countless options, and it is easy to believe you need the latest, lightest, or most expensive gear before you ever set foot on the trail.
You don’t.
You need a system that works well enough to get you started. You will learn from there.
I learned that myself. My first backpack was a secondhand external-frame pack. It wasn’t fancy, but it worked. Over the years I changed packs, changed gear, and learned what actually mattered to me.
The goal isn’t to get everything right the first time. The goal is to get out there and learn what works for you.
The Big 3
If you spend much time reading about backpacking, you will eventually hear about the “Big 3”: shelter, sleep system, and backpack.
These three pieces make up the foundation of your setup. They also account for a significant portion of what you will carry, so they are a good place to start.
There is an important detail here, though: buy the backpack last.
Your shelter and sleep system take up space. Everything else you bring has to fit around them. Once you know what you are carrying, you can choose a pack that holds your gear comfortably without carrying more pack than you need.
So let’s start with shelter.
Start with Shelter
Your shelter determines more than where you sleep. It is also one of the bigger factors in how much weight you carry, especially when you’re thinking about your base weight—the weight of your gear before you add consumables such as food, water, and fuel.
For most backpackers, that means a tent. When you first start looking at tents, the options can feel overwhelming. 1P, 2P, trekking pole, freestanding, fly-first—what does it all mean?
Let’s make it simple.
The “P” stands for person. A 1P tent is designed for one person, while a 2P tent is designed for two. That doesn’t necessarily mean a 1P tent will feel comfortable for one person with all their gear inside. Many backpackers choose a 2P tent or a slightly larger 1P+ shelter so there is room for both themselves and their gear.
When choosing your first shelter, keep a few things in mind:
- More expensive doesn’t necessarily mean better.
- Weight matters, but it isn’t the only factor.
- Choose something you can set up confidently.
- Make sure you have enough space for yourself and your gear.
It is easy to assume that spending more money automatically gets you a better shelter. It doesn’t. There are good budget options available, and borrowing a tent can be a great way to figure out what you like before spending a lot of money.
You also don’t need to chase the lightest shelter you can find. Every ounce eventually becomes something you carry, but saving weight isn’t worth much if the shelter is difficult to use or uncomfortable for you.
For your first trip, look for something that fits your needs, fits your budget, and gives you confidence that you’ll be able to set it up when you’re tired and ready to sleep.
Tents aren’t the only option, though.
My personal preference is a hammock. I’ve spent many nights in an Eno, both with and without a rainfly. I’ve also used a tarp as a rainfly. More recently, I switched to a hammock with an integrated bug screen and rainfly, and I have to admit that I like it better than my old setup.
For me, one of the biggest advantages is simplicity. I need two trees with enough space between them, and I don’t have to worry about finding a perfectly level piece of ground. That can make choosing a campsite much easier.
I also like being able to keep some of my gear off the ground by hanging it from the hammock straps.
Of course, hammocks have their own limitations. You need suitable trees, and cold weather requires some additional thought about insulation underneath you. Wind can also be a very different experience in a hammock than it is in a tent.
For me, though, a hammock is comfortable, simple, and works well for the places I backpack.
That’s really the point. There isn’t one perfect shelter. There is a shelter that works for you, the conditions you expect to encounter, and the way you want to experience the trail.
Sleep System
Once you have a shelter, you need a way to sleep comfortably in it.
A good sleep system has three basic parts:
- Sleeping pad
- Covering
- Pillow
The first two are important for staying warm and getting a good night’s sleep. The third is mostly about comfort.
Sleeping Pad
I spent many nights backpacking without a sleeping pad. After finally using one, I’m not sure why I waited so long.
A sleeping pad gives you insulation from the ground or, in a hammock, from the air underneath you. It also helps distribute pressure and makes it much easier to find a comfortable position.
Choose a pad that fits both your shelter and your body. If you’re tall, you may need a longer pad. If you need more width, get a wider pad. There is no shame in choosing the size you actually need. Comfort matters when you’re trying to sleep in the backcountry.
There are several ways to inflate a pad. Some are self-inflating. Some use an inflation sack. Some have a built-in pump, while others require you to inflate them yourself.
There isn’t one right answer. Some people don’t mind blowing up a pad themselves. Others would rather use a pump or inflation sack. Choose what works for you and fits your budget. If you don’t like it, you can change your system on the next trip.
For my hammock, I use a long, wide pad that fits into the sleeping pad pocket. The pocket keeps the pad from moving around while I sleep.
Covering
Your covering provides much of your warmth, while your sleeping pad provides critical insulation underneath you. A sleeping bag is the most familiar option, but quilts are another popular choice.
Sleeping bags come in different shapes and materials, and there are advantages to each. For your first trip, don’t worry about finding the perfect bag. Choose something appropriate for the temperatures you expect to encounter and comfortable enough for you to sleep in.
Pay close attention to temperature ratings when you shop. This is one place where the numbers can be misleading.
Some manufacturers list a comfort rating, while others may prominently display a lower limit or extreme rating. Those numbers do not mean the same thing. A comfort rating is intended to represent a temperature at which an average sleeper can remain comfortable. An extreme rating is about surviving cold exposure, not sleeping comfortably through the night.
Don’t choose a sleeping bag based on the lowest number printed on the package. Look at what that number actually represents and compare bags using the same type of rating.
If you’re backpacking somewhere where temperatures will stay well above freezing, you don’t need to carry the extra weight of a sub-freezing sleeping bag simply because it sounds more capable.
Choose the covering that fits the conditions you’ll encounter and keeps you comfortable.
A quilt works much like a sleeping bag, with one major difference: it doesn’t have insulation underneath you. That may sound strange at first, but when you’re lying on insulation, your body compresses it and reduces much of its insulating value. Your sleeping pad provides the insulation underneath you instead.
If you’re using a hammock, you may also use an underquilt, which provides insulation beneath the hammock.
Pillow
A pillow isn’t essential, but for me it is worth carrying.
They take very little space, and there are inexpensive options available. You can also improvise with clothing or other gear if you don’t want to carry a dedicated pillow.
Sleep is important. If a small amount of extra weight helps you sleep better, it may be worth carrying.
Your Pack
Once you have your shelter and sleep system figured out, you can choose your backpack.
This is why I recommend buying the pack last. You need to know what you’re carrying before you can know how much space you need.
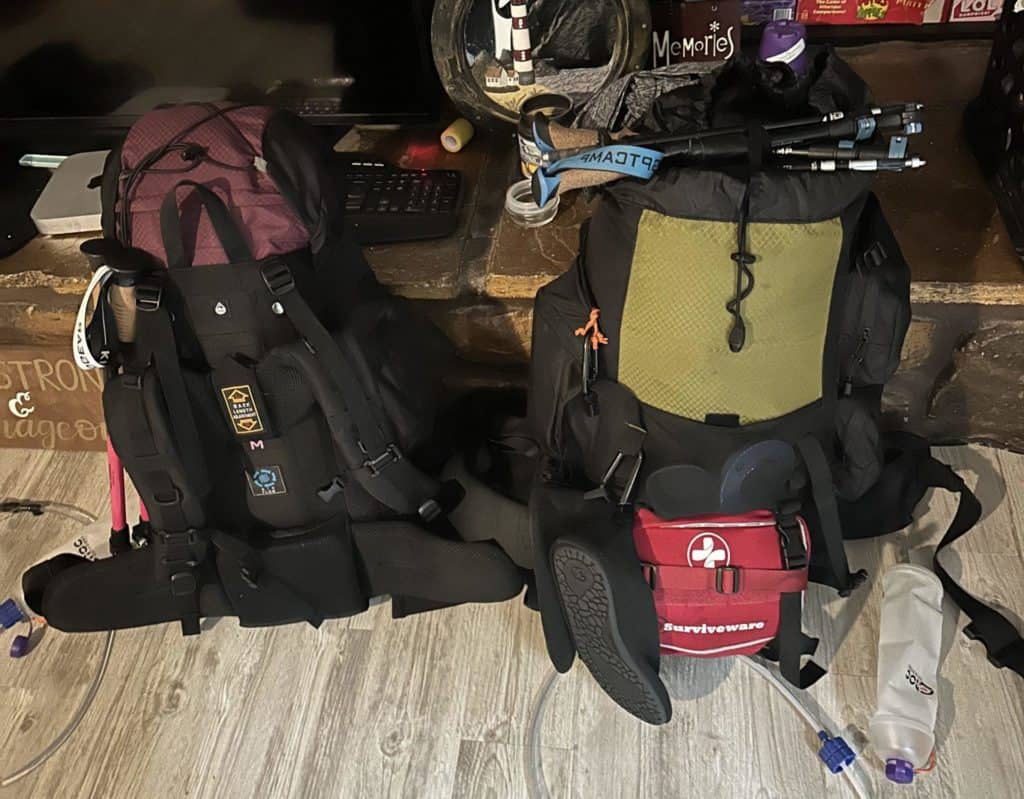
For me, a 65L pack is comfortable for three to seven days. For trips shorter than three days, I can drop down to a 30L pack. That may not be true for you. Your gear, food, experience, and comfort level will all affect how much space you need.
If you can, take your gear to an outfitter and try fitting it into several different packs. This is one of those situations where actually trying something on is worth the effort.
I like a pack with a well-padded hip belt and pockets on the sides. I also like water bottle pockets that I can reach easily and prefer to keep my shoulder and other straps clear of gear.
Your preferences may be completely different. You may want water on your shoulder strap. You may not want a hip belt. You may prefer different pockets or no pockets at all.
Pack in a way that works for how you interact with your backpack.
I also like to give everything a place. My charger, headlamp, and other small electronics go together. Hygiene items have their own place. Small accessories have another. Larger items go in the main compartment, while things I need to reach quickly go toward the top or in an outside pocket.
You may organize yours differently. What matters is that you know where your things are and can get to what you need without emptying your entire pack.
As you pack, think about both weight and order. Items you may need during the day should be easy to reach. Heavier items generally belong closer to the middle of your back rather than hanging far away from it.
Your pack doesn’t need to look like mine. It needs to make sense to you.
Other Essentials
Once the Big 3 are out of the way, you can start filling in the rest of your pack. These items take up less space than your shelter and sleep system, but they still deserve some thought.
Here are some of the things I consider essential:
- Headlamp
- Hygiene kit
- Water filtration or treatment
- Food storage
- Water bottles
- Clothing
- Food
Let’s take a quick look at each one.
A good headlamp doesn’t need to light up the entire forest. It needs to help you see well enough to do what you need to do: set up camp, cook, find your way around camp, or take care of nighttime necessities. You don’t need anything fancy. You just need a reliable light and a way to carry it.
Your hygiene kit doesn’t have to be complicated either. Everybody poops. Bring whatever you need to take care of yourself and leave no trace—toilet paper, a bidet, wipes you can pack out, hand sanitizer, soap, or whatever system works for you. Keep yourself clean, and more importantly, follow the sanitation practices required for the area you’re visiting.
Water deserves a little more attention. Know where your water sources are before you leave and have a reliable way to treat the water you collect. There are many different filters and treatment methods available. I use a Sawyer filter, but there are plenty of good options. The important thing is knowing what your method can handle and using it correctly.
You’ll also need a way to store your food safely. Depending on where you’re backpacking, that may mean a bear hang, a bear-resistant canister, or another approved method. The right choice depends on the area you’re visiting, so check the local requirements before you go. Whatever method you use, keep food and other attractants stored appropriately rather than keeping them in your shelter.
Clothing is another area where backpackers have strong opinions. Some people bring only what they are wearing. I like to carry a change of clothes because it makes me more comfortable.
Whichever camp you fall into, make sure your clothing matches the conditions you expect to encounter. Lightweight, moisture-wicking clothing can work well, but you don’t need to replace your entire wardrobe before your first trip. Bring what you have, avoid materials that become heavy and uncomfortable when wet, and add insulation or rain protection when the weather calls for it.
I prefer a poncho for rain because it is light and easy to carry.
Food may be one of the harder things to figure out. Backpacking meals are convenient, but they can be expensive. Making your own can take some trial and error. And no matter what you choose, you need enough calories to fuel the days ahead.
Nut butters are an easy way to add calories. Packaged meats such as tuna or chicken provide protein. Noodles and rice are inexpensive, easy to carry, and simple to prepare.
Find what works for you.
I usually take tuna, nut butters, tortillas, dried fruit, rice or noodles, nut blends, dried meats, and coffee. That system has served me well for many years and thousands of miles.
Comfort Items
Beyond the basics, there are things you can live without but may choose to bring anyway. These are the things that make your backpacking system feel like yours.
Here’s my list. Yours may look very different, and that’s okay.
- Cook system — stove, fuel, and cook pot
- Hat
- Trekking poles — these can be essential depending on the trail and the hiker
- Compact microfiber towel
- First-aid kit — heavier than some people prefer, but worth it to me
- Journal and pen
- Coffee system — cup and filter
- Camp or water shoes
- Extra socks
None of these make or break a backpacking trip. They are simply things I’ve learned I appreciate having with me.
That’s part of the fun of backpacking. You start with the basics, take them into the woods, and learn what matters to you.
Over time, your pack becomes less about having the “right” gear and more about having the right gear for you.
The Trail Continues
This isn’t a complete backpacking guide, and it isn’t meant to be. There are too many options, environments, preferences, and personal systems to cover them all in one article.
There is no one perfect backpacking system.
Start with the basics. Take them into the woods. Pay attention to what works, what doesn’t, and what you wish you had done differently. Then make adjustments for the next trip.
Over time, you’ll build a system that fits you.
That’s really the goal. Not having the perfect gear, but having what you need to step onto the trail with confidence and spend a few days there.